WHM administrators can provide users on their cPanel servers with complimentary SSL certificates powered by Sectigo through AutoSSL. This guide shows you how to enable or disable AutoSSL globally and for specific user accounts from the WHM panel.
Background
AutoSSL is a cPanel utility that autonomously creates and renews free SSL certificates (powered by Sectigo) every three months for users and domains. It conducts regular audits of installed certificates, replacing those nearing expiration. The application also evaluates the security standards of these certificates and rejects any that fail to meet the baseline security requirements.
How to Enable/Disable AutoSSL
-
Step 1: Access WHM
Log in to your WHM root account.
-
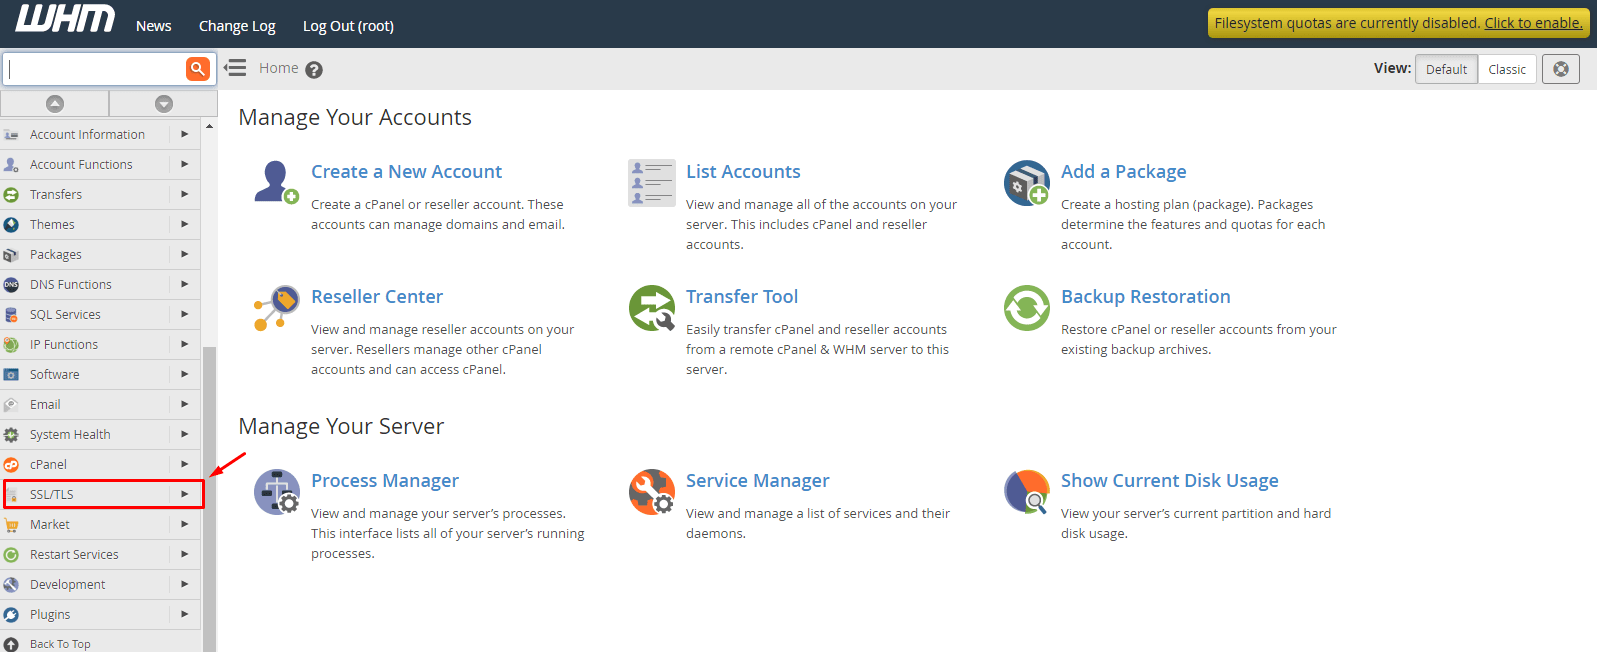
Step 2: Navigate to SSL/TLS Settings
In the WHM menu, navigate to the SSL/TLS option.
-
Step 3: Open Manage AutoSSL
Select Manage AutoSSL from the menu.
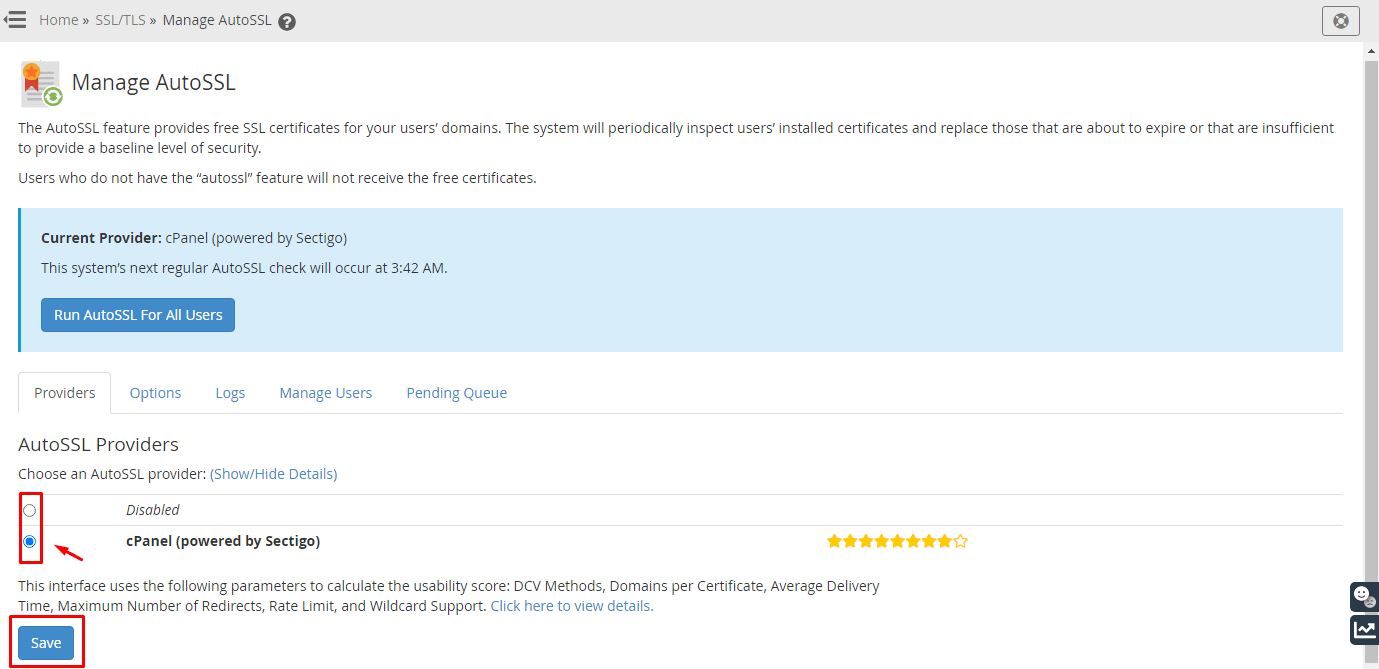
The AutoSSL management panel will open, presenting various tools and options for the utility.
-
Step 4: Configure AutoSSL Provider
Navigate to the AutoSSL Providers section.
Choose between Disabled or cPanel (powered by Sectigo) to disable or enable the AutoSSL provider.
-
Step 5: Save Global Settings
Click the Save button to keep your changes.
-
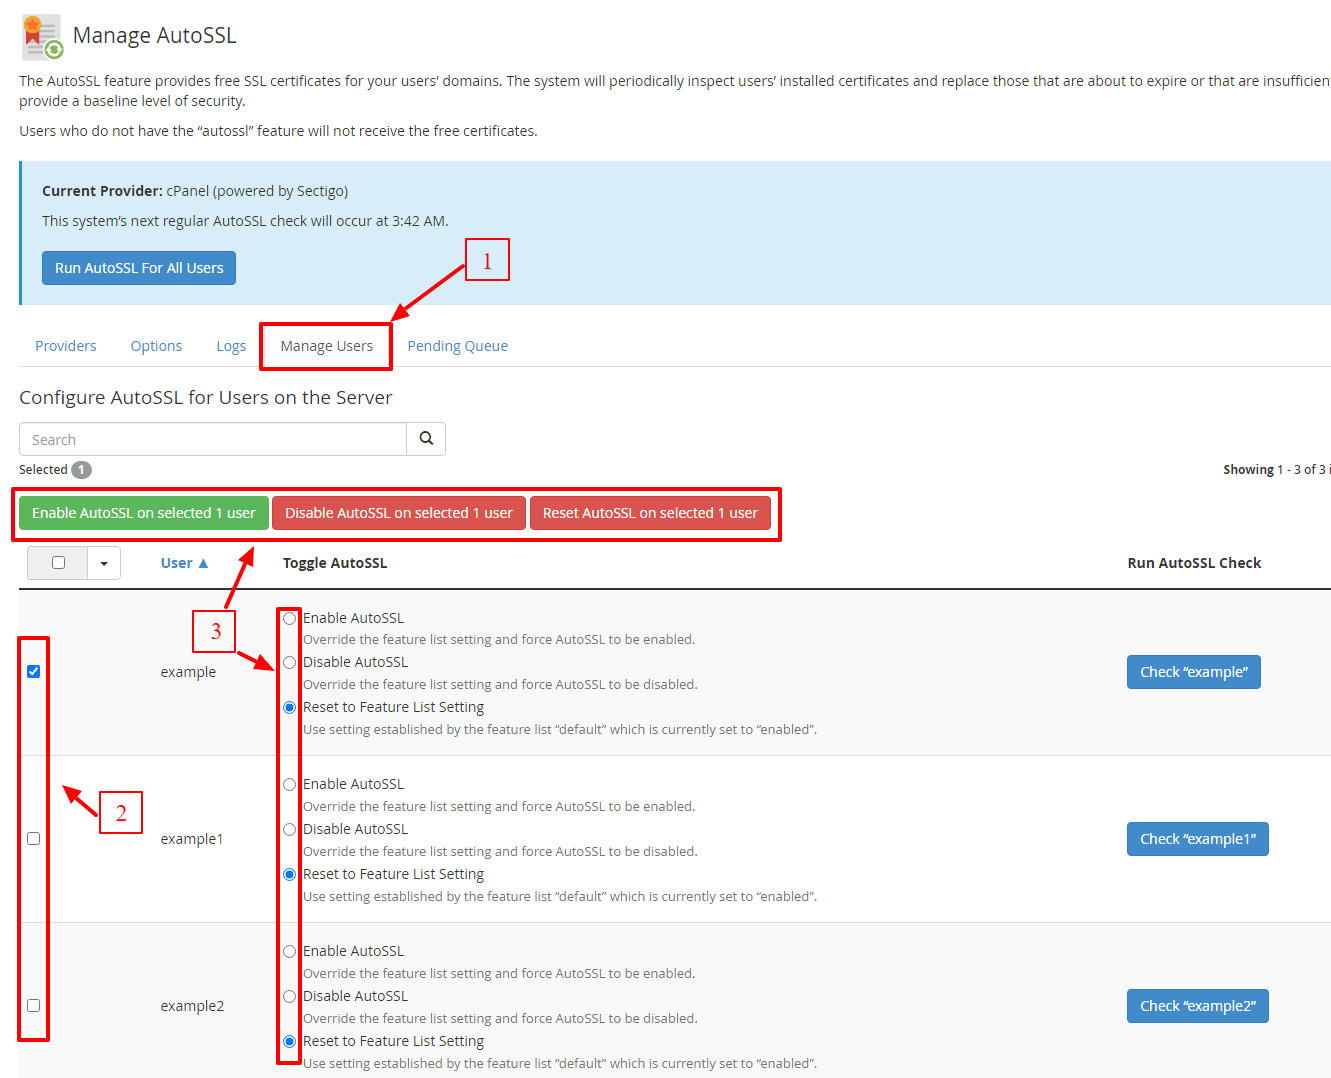
Step 6: Manage AutoSSL for Specific Users
Click on the Manage Users tab.
This tab contains AutoSSL configuration parameters for each user account on your server.
-
Step 7: Configure User-Specific Settings
To adjust an account's AutoSSL option, select the user account and choose from one of the three options:
- Enable AutoSSL – Activate AutoSSL for this user
- Disable AutoSSL – Deactivate AutoSSL for this user
- Return to the Feature List – Reset to the original setting
Users with AutoSSL disabled will not receive complimentary SSL certificates from cPanel.